
The sterilization of medical equipment is an important part of health care, since the equipment and treatment room surfaces are often exposed to blood and other tissues and therefore are at risk for becoming contaminated. The process protects both health care workers and patients by preventing infections, and it allows devices to be used again instead of thrown away after one procedure.
Medical assistants are typically responsible for the sterilization of shared medical equipment. While the use of pre-sterilized and disposable supplies has reduced the autoclave’s role, it’s still the gold standard for sterilizing instruments like forceps, scissors, and other reusable items. As part of a quality infection control program, medical assistants also calibrate and maintain autoclaves to ensure they’re doing their job. Checking the integrity of gaskets and door locks is important for safety, as leaks could impact performance.
Autoclave
Steam under pressure in the autoclave is the best method of sterilization, because it kills all pathogens and spores. Pressurized steam is fast, convenient, and dependable. The pressure allows for heat higher than the boiling point, and when combined with moisture, these two factors create a very effective mechanism for killing all microorganisms. When steam is admitted into the autoclave chamber, it simultaneously heats and wets the object, coagulating the proteins present in all living organisms. When the cycle is complete and the chamber has cooled, the steam condenses and explodes the cells of microorganisms, thus destroying them. To be effective, the steam moisture must come in contact with all surfaces being sterilized. Steam under pressure is capable of much faster penetration of fabrics and textiles than dry heat, but its use has definite limitations if the proper techniques are not followed.
Learning Sequence Builds Confidence
The learner practices the procedure in the ‘guided mode’ (interaction hints and an expanded checklist guide) as often as they like.
When the learner is confident that they can accurately demonstrate the procedure without error, the learner plays the level in the ‘expert mode’ (no hints or checklist explanations) - which they can repeat as often as they wish.
Finally, when the learner is confident that they have mastered the procedure - they take a one-time ‘exam’ attempt which results in their grade for that procedure.
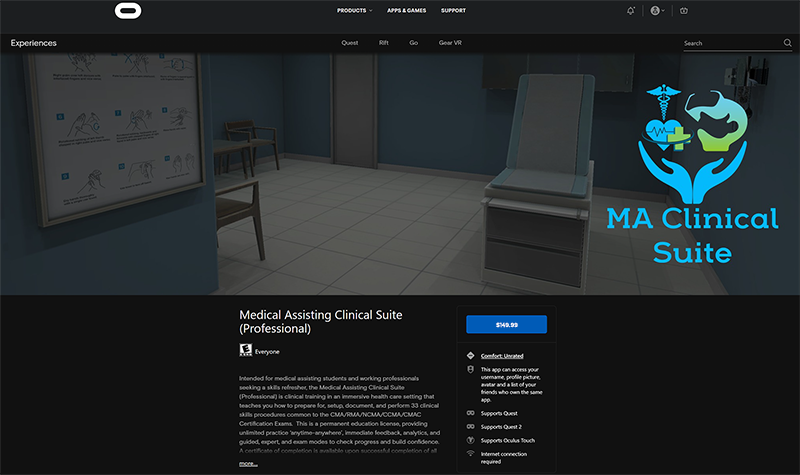
The Medical Assisting Clinical Suite (Professional) Edition is available for purchase through the Oculus AppLab for $149.99
Features
Guided Mode - ghosted hints show step-by-step positions, learner can 'see through' the patient to verify placement.
Oculus Quest Affordability & Ease of Use - next generation game development processes allow the untethered, mobile VR to present effective visual and interaction fidelity at 1/4 of the cost of desktop VR.
Feedback - Cloud-based enterprise incorporates real-time data acquisition that allows learner to track progress and mastery, and provides detailed insights for debrief with faculty.
Support - Enterprise incorporates Knowledge Base (with tutorial videos & FAQ) - combined with help desk support staff for learners and staff.
Sterilize Equipment Checklist
- Gather supplies.
- Perform hand hygiene.
- Collect and assemble already sanitized and disinfected items to be wrapped. Put on disposable gloves.
- Place the wrapping material on a clean, flat surface.
- Place the item (or items) diagonally at the approximate center of the wrapping material. Make sure the size of the square is large enough for the items.
With the squares that are cloth fabric, use two pieces if the cloth is single layered; follow the manufacturer’s recommendation when using commercial autoclave wrapping paper. - Open any hinged instruments. If the instrument is sharp, its teeth or tip should be shielded with cotton or gauze.
- If the package is to contain several items, place a commercial sterilization indicator inside the package at the approximate center.
- Bring up the bottom corner of the wrap and fold back a portion of it.
- Repeat the above step with each corner, making sure to turn back a portion each time.
- Fold the last flap over.
- Secure with autoclave tape and label the package with the date, including the year, contents, and your initials.
- Check the water level in the reservoir and add distilled water as necessary.
- Turn the control to “Fill” to allow water to flow into the chamber. The water flows until you turn the control to its next position.
- Load the chamber with wrapped items, spacing them for maximum circulation and penetration.
- Close and seal the door.
- Turn the control setting to “On” or “Autoclave” to start the cycle.
- Watch the gauges until the temperature gauge reaches at least 121° C (250° F) and the pressure gauge reaches 15 pounds (lb) of pressure.
- Set the timer for the desired time.
- At the end of the timed cycle, turn the control setting to “Vent.”
- Wait for the pressure gauge to reach zero.
- Standing behind the autoclave door, carefully open the chamber door ¼ inch.
- Leave the autoclave control at “Vent” to continue releasing heat.
- Allow complete drying of all articles.
- Using heat-resistant gloves, remove the items from the chamber and place the sterilized packages on dry, covered shelves or open the autoclave door and allow the items to cool
- completely before removal and storage.
- Turn the control knob to “Off” and keep the door slightly ajar.
- Document the procedure according to agency policy.